- The is a step by step guide on how to super impose an image map (Made to Scale) on to a GIS Map.
- The example of a image map was sourced from here
- The tool used to demonstrate Georeferencing the Image Map here is Map Warper


Step 1: The image map should of image file type (preferably png), Please convert any pdf map to a image format first.
Step 2: Create a Map Warper account, login and click on the ‘Upload Map’ tab, enter a name for the resultant map, any other details and upload the image map from file or from a url and click on the ‘Create’ button at the end (The ‘Create’ button is not visible in the screen shot below, but is present in the online tool)
Step 3: The image map would be loaded and displayed as a Image.
Step 4: Now click on the ‘Rectify’ Tab, to start the process of Georeferencing.
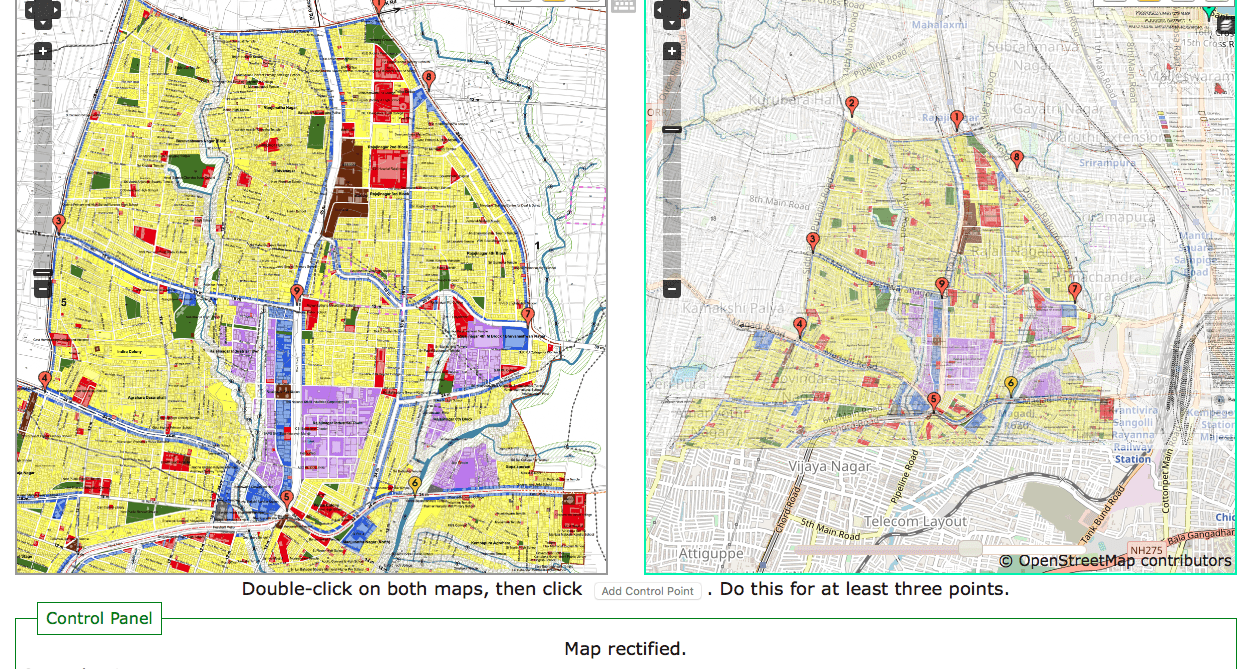
Step 5: You will need to manually find the location of the Image Map on the left in the GIS Map to the right and match the views as much as possible.
Step 6: You need to now manually add corresponding Control Points/Reference points pairs (One on each map) on the maps. Click on the Green Balloon marker button (Top Right toolbar) to go into Control Point Mode and add at least 3 corresponding Control Points pairs. This is the most important step and please take your time to make sure the corresponding Control Points are near perfect. A good way to get this step right is identify landmarks in the target area, preferably at the boundaries of the target area and use them as Control Points.
Note : Always Remember to Click on the ‘Add Control Point’ button after adding every Control Point Pair to save before adding another Control Point Pair.
Step 7: Repeat step 6 for at least 3 Control Point Pairs, if not more and always remember to click on the ‘Add Control Point’ button after adding every Control Point Pair.
Step 8: Now click on the ‘Wrap Image’ button, on completion of the Wrap process the Image Map on the Left Would have been super imposed on to the GIS Map to the right.
Step 9: Now click on the ‘Preview’ Tab, to view the resultant Georeferencing Image on GIS Map.
- You can adjust the transparency of the super imposed image map through the slider at the bottom and also zoom in to see in detail.
- This map can be exported to be viewed on other GIS platforms.

- There are also advanced features to ‘Crop’, ‘Align’ the result as required.
- Check the final map here