Many public departments put out maps in the form of pdfs instead of map file formats (kml/kmz, shapefiles or geojsons). These maps are usually generated with Autocad and you can see layers on the map which resolve as you zoom deeper.

Extracting the map layers from pdf to geojson
This explainer will walk you through the steps and tools needed to convert map pdf files into actual map files by extracting specific layers of interest. These instructions are for Windows PCs and will use extraction from the file BWSSB_WATERLINE_GREATER THAN 300.pdf as e.g.. The file can be downloaded from here.
- To start with, download the gdal command-line tools from the GISInternals Support Site. The latest version is the last one in the table. Clicking on it will download a zip file to your computer which looks like this: release-1930-x64-gdal-3-5-3-mapserver-8-0-0.zip.
- Extract the zip file into its folder. Open command-line using Win + R and typing ‘cmd’. Navigate to the extracted folder and execute ‘SDKShell.bat’. This will give you the following output. It will have set the environment variables so that the commands are available everywhere.

- Now, in the same command-line window navigate to the folder with the pdf file to be converted. First, we will extract the layers that have been added into the pdf using the tool ogrinfo. The command to run is:
>ogrinfo “BWSSB_WATERLINE_GREATER THAN 300.pdf” > BWSSB_Layers.txt - The output of this will be in the file “BWSSB_Layers.txt” and will look like the below. The highlighted layers are what we are interested in.
INFO: Open ofBWSSB_WATERLINE_GREATER THAN 300.pdf' using driverPDF’ successful.
Metadata:
CREATION_DATE=D:20211018145833+05
CREATOR=Esri ArcMap 10.8.0.12790
NEATLINE=POLYGON ((765711.295508754 1408287.3140691,765711.360388123 1462430.22505435,803817.330147499 1462430.34227045,803817.726222496 1408287.65154319,765711.295508754 1408287.3140691))
1: Layers_Other
2: Layers_BWSSB_WATERLINE
3: Layers_DIVISION_BOUNDARY
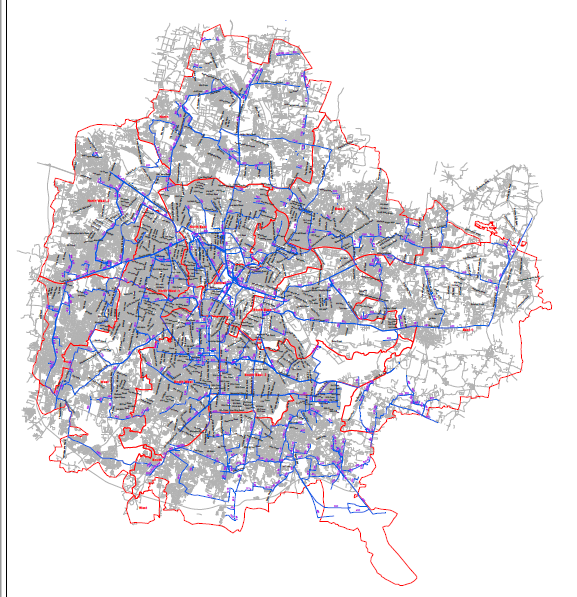
4: Layers_BWSSB_ROAD - The map contains information like roads, the water line in blue, and Taluk division boundaries in red. The blue water supply line in the map correlates to “Layers_BWSSB_WATERLINE”.
- Next, we extract just this layer using the tool ogr2ogr. This tool requires a Coordinate Reference System(CRS) to be provided. You can find the CRS using https://projfinder.com by zooming to the location you need, or use the ones provided in the command below, which applies to most of India. We will first extract the map in geojson format using the command ogr2ogr as below:
>ogr2ogr -f “GEOJSON” BWSSB_WATER_LINE_GT_300MM.geojson “BWSSB_WATERLINE_GREATER THAN 300.pdf” Layers_BWSSB_WATERLINE -s_srs EPSG:32643 -t_srs EPSG:4326 –config OGR_PDF_READ_NON_STRUCTURED YES- More details of the command can be found using “ogr2ogr -help”.
For most purposes only the pdf file, geojson output name and layer name, highlighted in blue need to be provided by us, while the red parts can be used as is. Make sure the geojson file does not already exist. - Note that the “config” in the command needs to be preceded by two hyphens.
- More details of the command can be found using “ogr2ogr -help”.
- This will output the file: BWSSB_WATER_LINE_GT_300MM.geojson. We can use this for maps or convert it to kml format using Google Earth Pro.
Converting geojson to kml
- To convert the above geojson to kml, download and open Google Earth Pro.
- In Google Earth Pro, select File->Open and navigate to the geojson file generated above. This will open the map under “Temporary Places”. By default the colour of the lines is “white” as nothing is selected for colours.

- We need to add colours to these lines to display correctly. For this, in the panel on the left, under “Temporary Places” right click on “Layers_BWSSB_WATERLINE” and select “Properties” . In the dialog box that shows up select the “Style, Color” tab, and click on “Share style”.
- In the options that are now visible, click on the box next to “Color” under “Lines” and pick your colour.

- Assuming you choose blue, the map will now look like this.

- Right-click on “Layers_BWSSB_WATERLINE” and select “Save Place As…” and save the map as kml. You are now ready to use this map anywhere.
(These instructions are adapted with examples from the ones sent by Nikhil VJ to datameet after converting Delhi Development Authority’s maps, and more details and tools can be found here in his post.)